How to install WordPress
- Log in to your BMIT Cloud Control Panel account.
- Navigate to the Services tab in the top menu.
- Select the My Services menu item.
- Select your Web Hosting Package from the list.
Our web hosting allows you to set up your site from our main panel or from the DirectAdmin interface. This guide is based on the DirectAdmin interface.
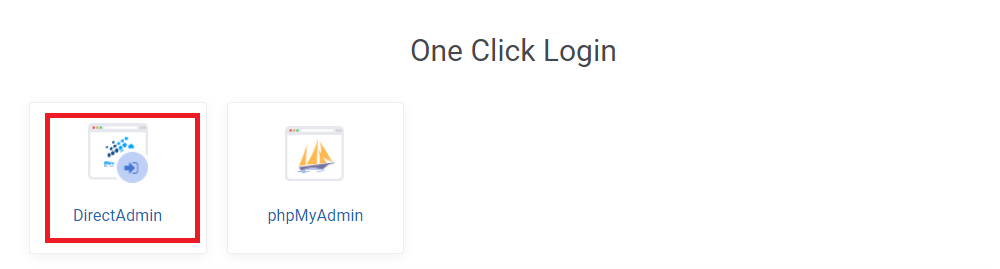
- Scroll down and find the section with heading "One Click Login" and click "DirectAdmin". You will be taken to a new panel.
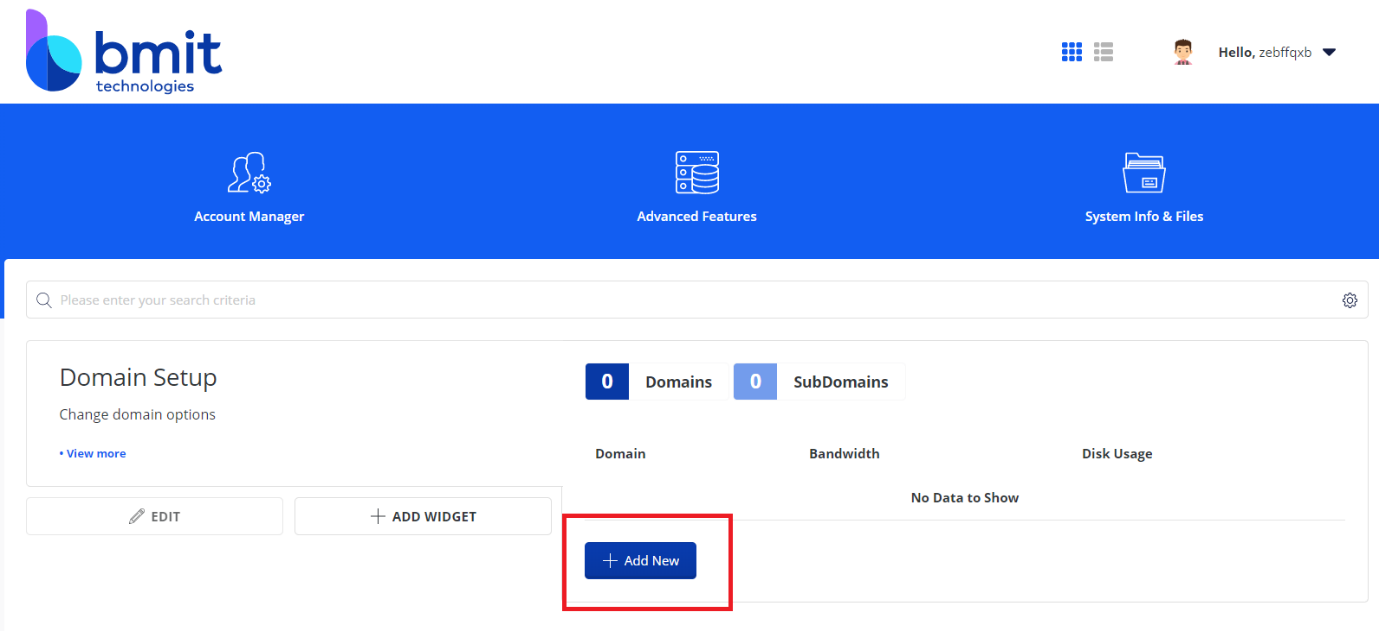
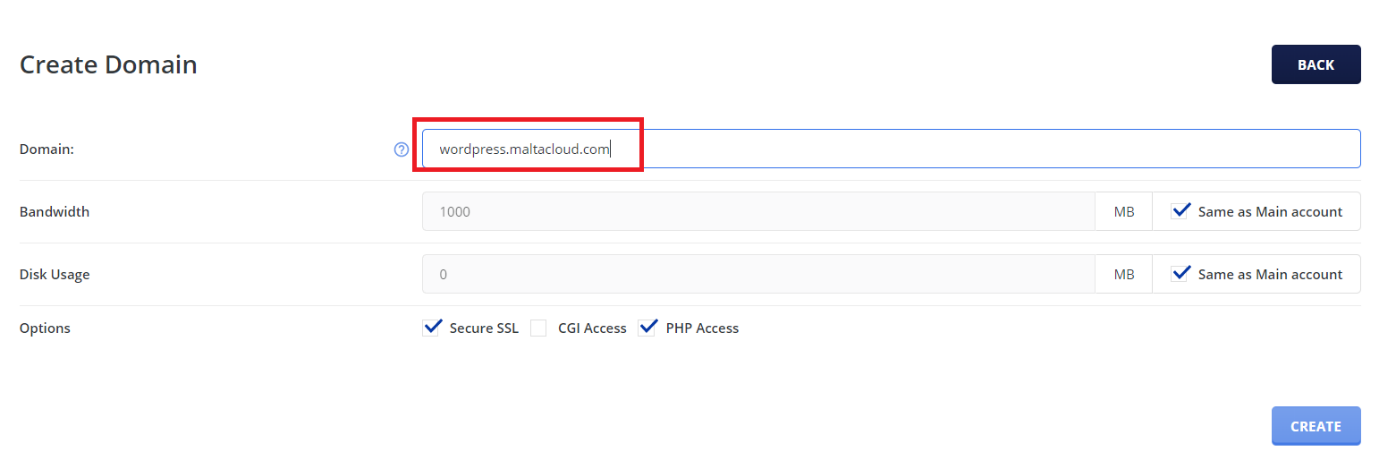
- Once the DirectAdmin panels opens up, ensure you add your domain.
-
Next, we will create the database (as per step 2 of the WordPress guide).
-
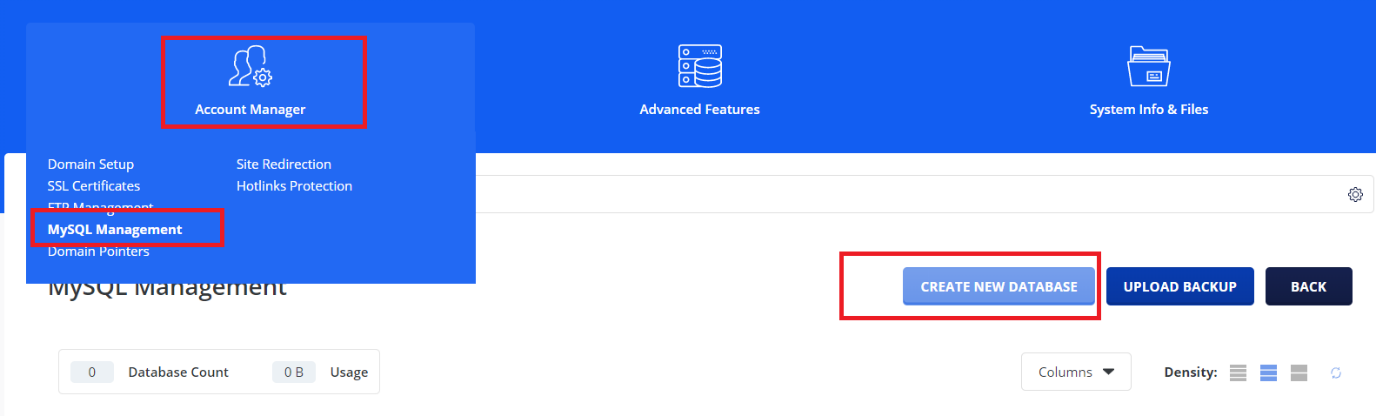
In the DirectAdmin panel, click on Account Management and select MySQL Management and click Create New Database.
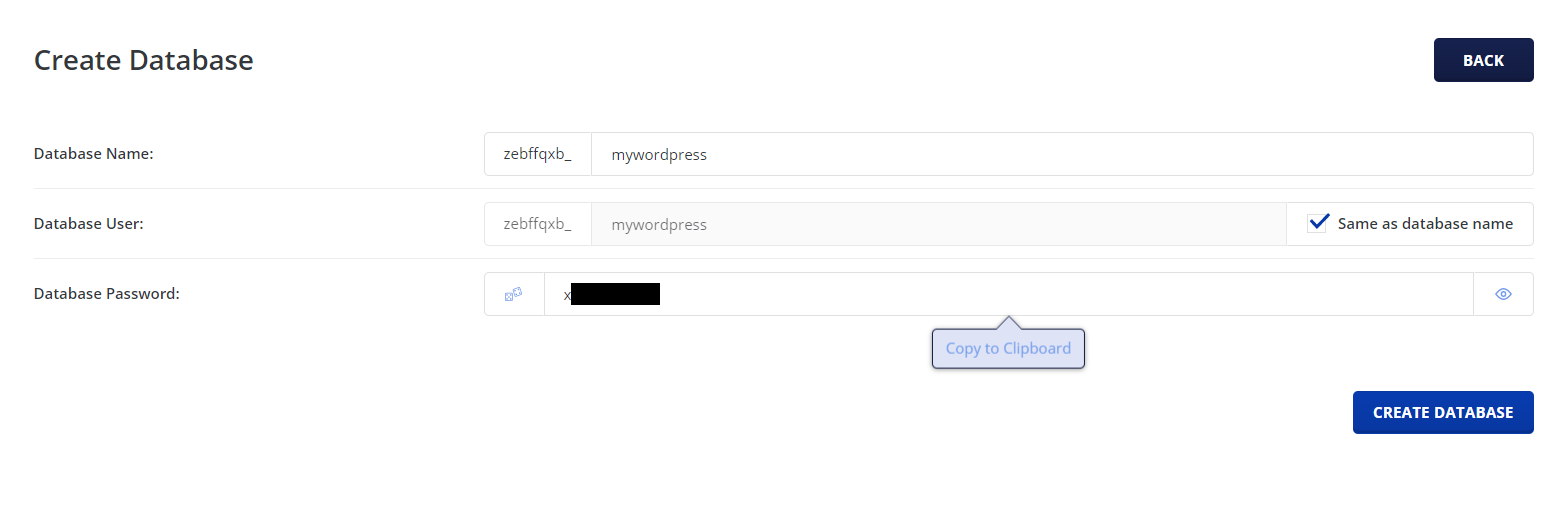
- Give your database a name, choose a password and take note of these as they will be needed later.
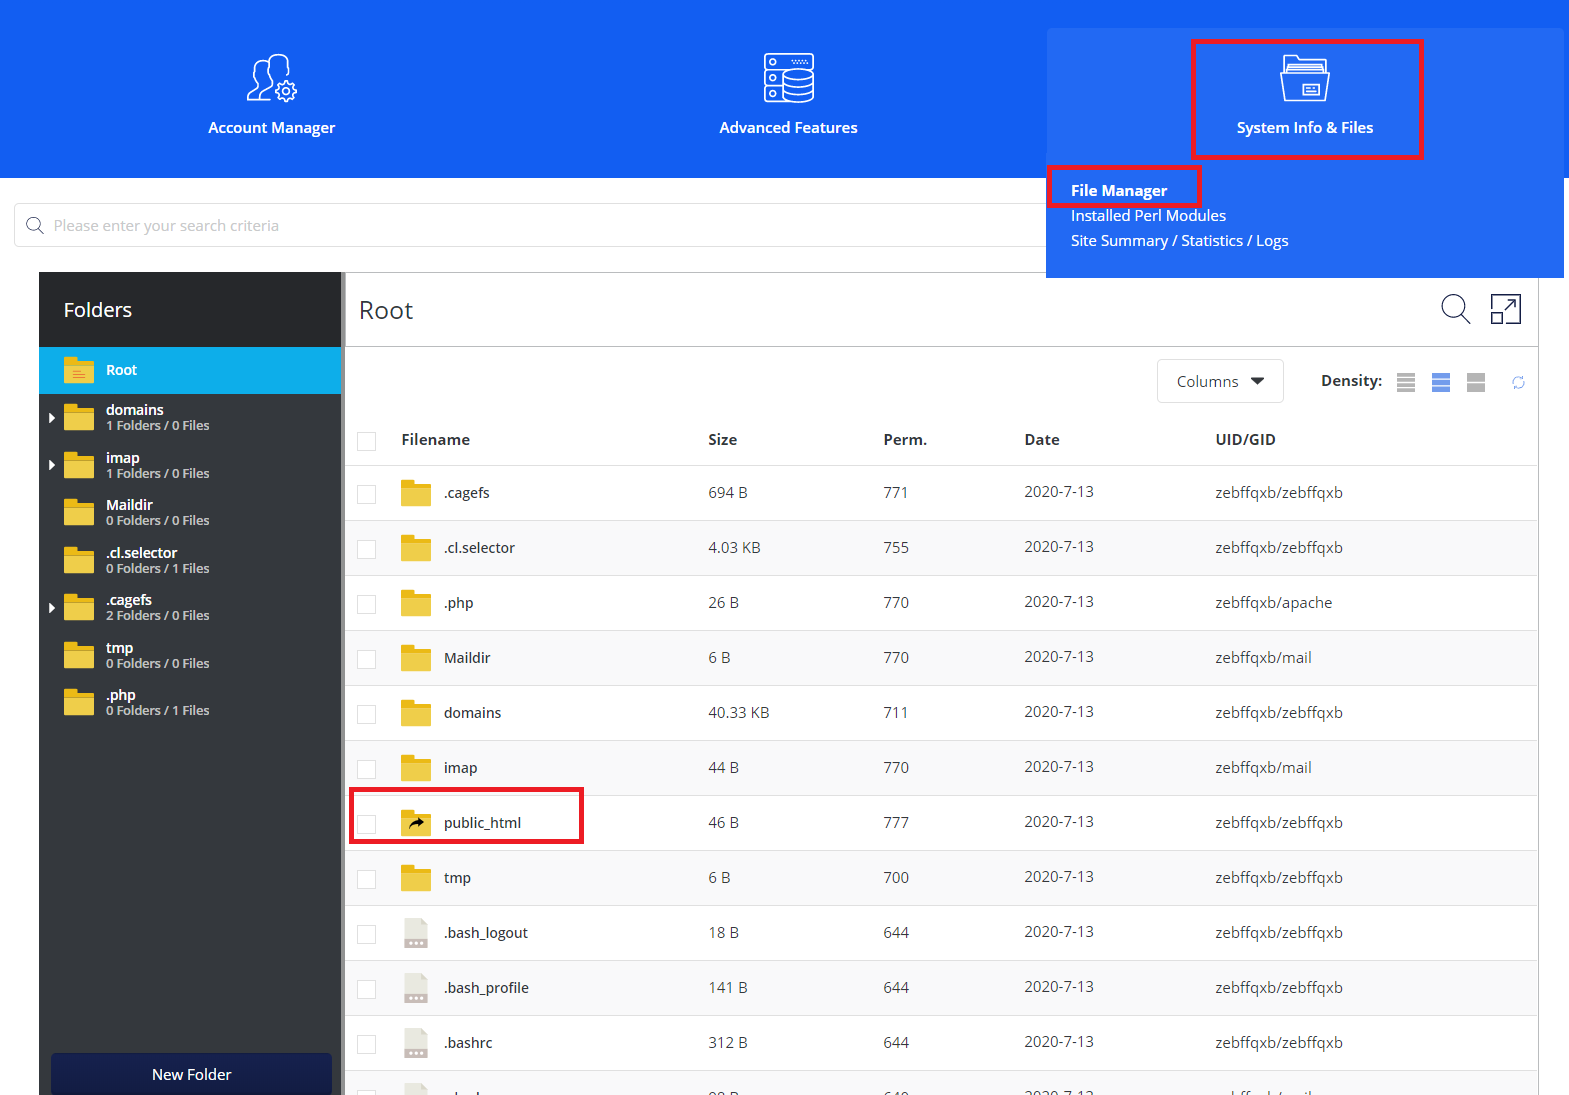
- Next, we will upload the WordPress package which was downloaded at the beggining. There are two ways to do this - via FTP or via the File Manager. In this guide, the file manager is used. Therefore, Navigate to the System Info & Files top menu and select File Manager.
-
You will need to upload the package to the right folder. This is done by navigating to domains under Folders, clicking the domain where your site will reside and then opening the public_html folder.
-
Once you open that folder, click the Upload file button and simply drag and drop the WordPress zip file to the indicated area. Click Upload.

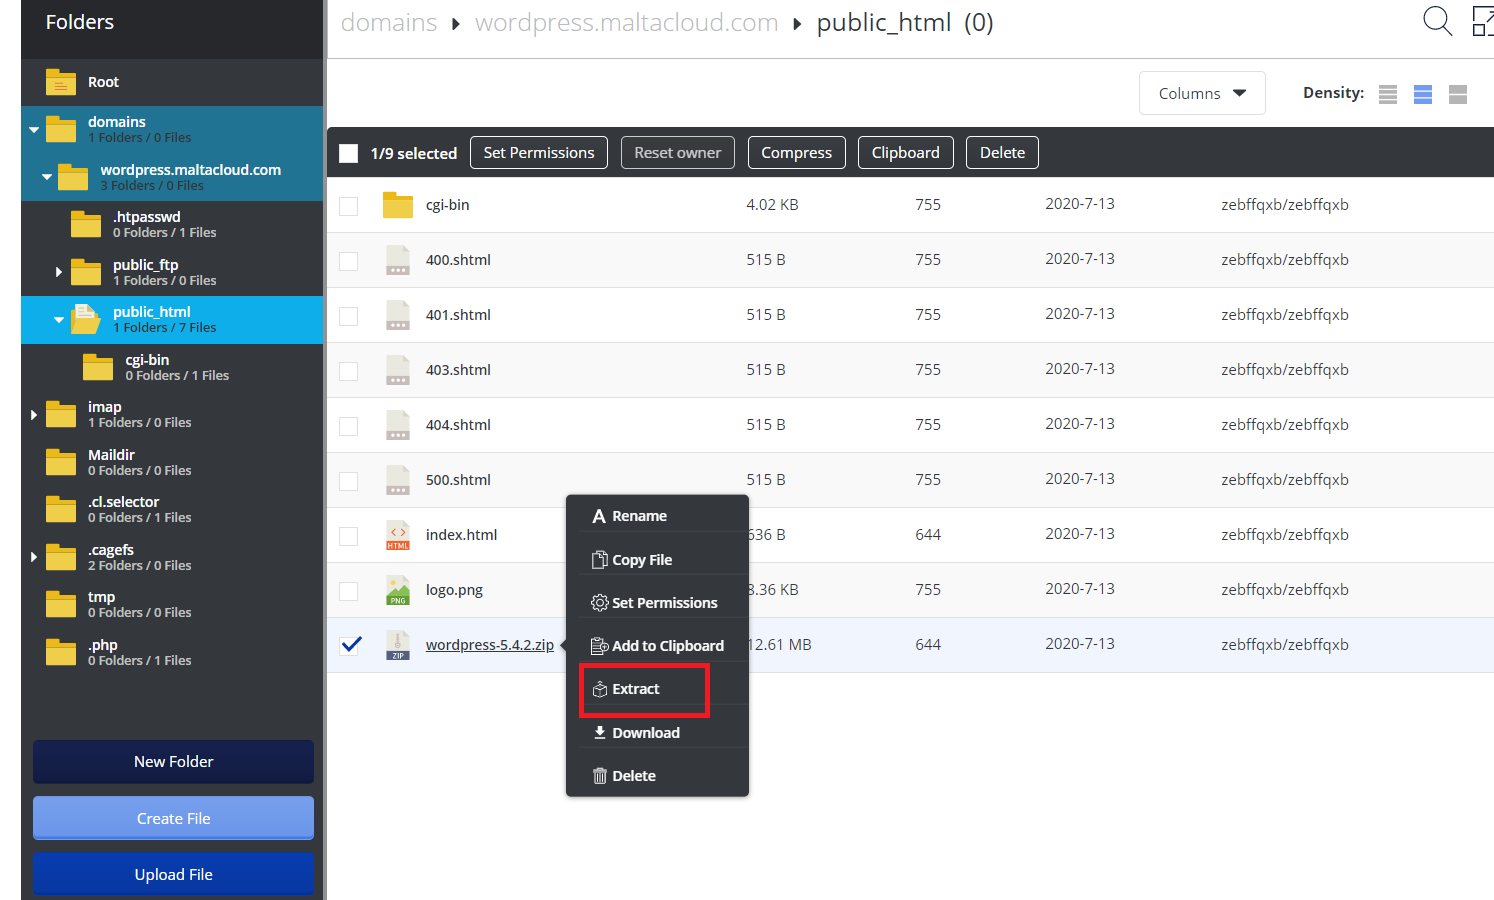
- When the upload completes, you will see your uplodaed file in the list of files on the file manager. Simply right click the file and click Extract.
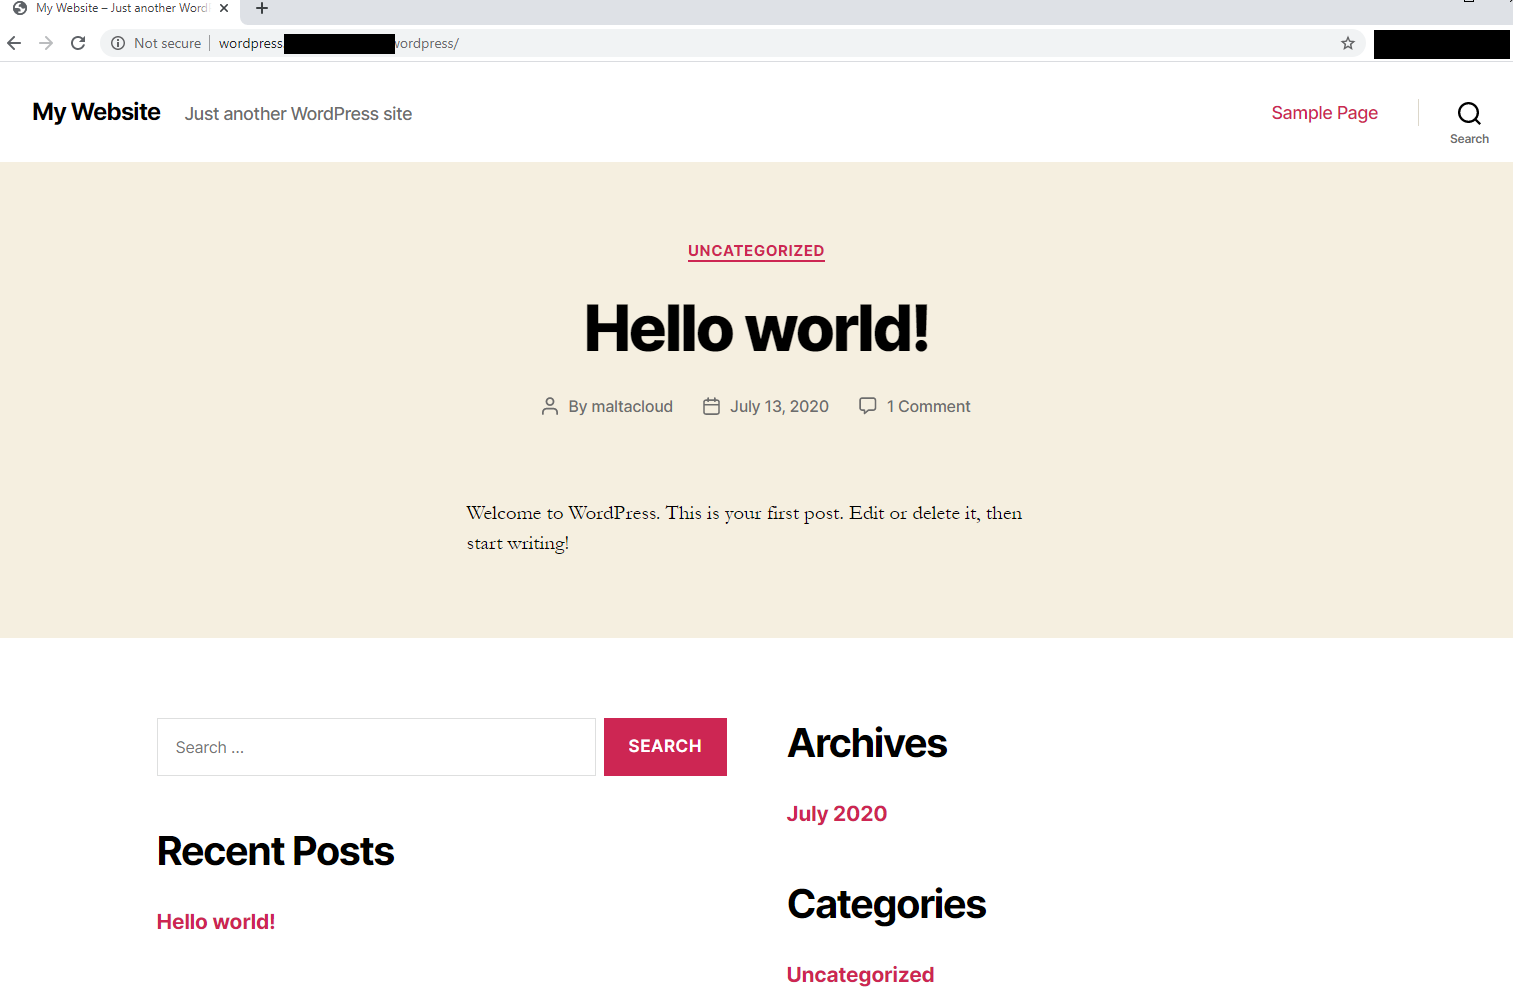
- Your WordPress intallation is now almost complete. To continue, simply navigate to http://www.yourdomain.com/wordpress and you can continue the installation.
-
The WordPress installer will now ask you for information on completing your website, including information about the site administrator. Fill these in as you require.
-
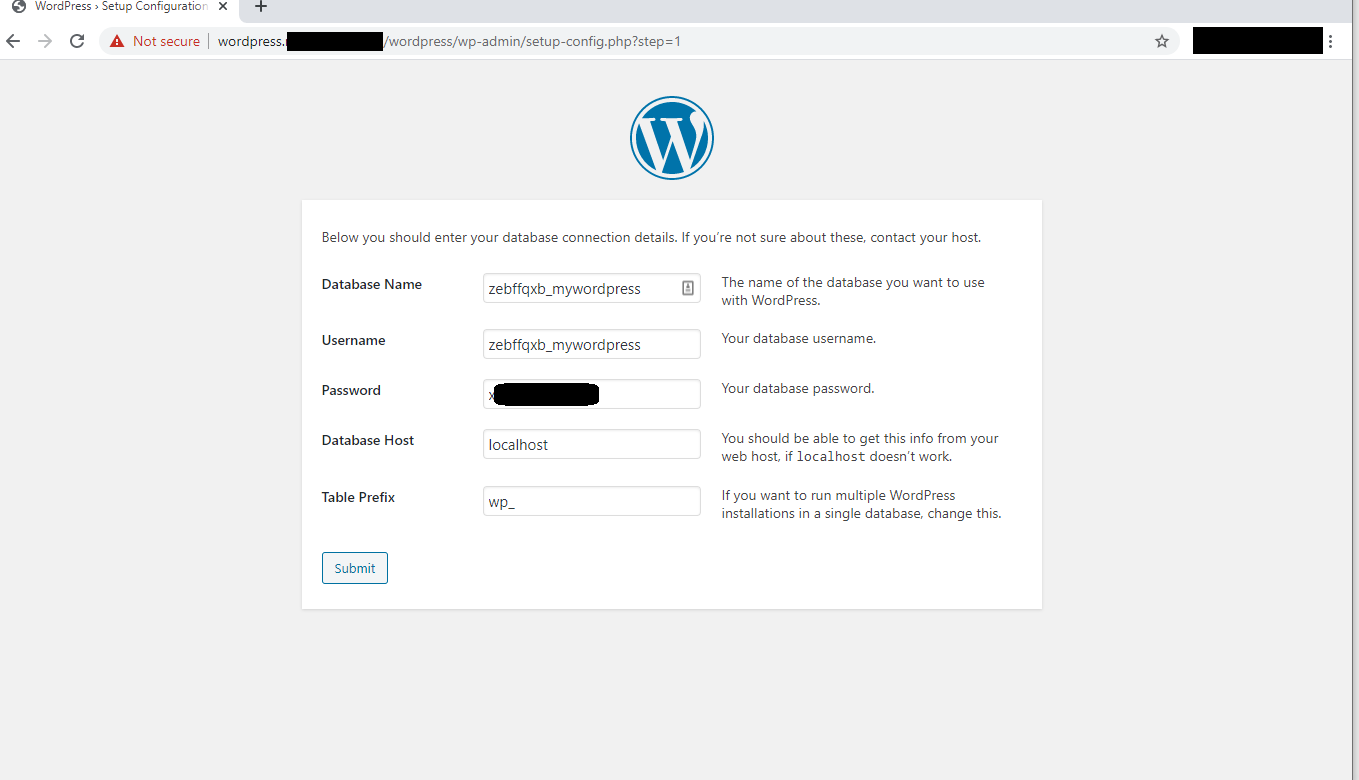
The WordPress installer will also ask for the database information. Populate this information with the data saved in the previous step where the database was created.
- Upon completion of these steps, your WordPress website will be ready.