Microsoft 365 - Configuring a new Microsoft 365 service
Go back to the Microsoft 365 Overview page
To log in for the first time you must first change the password for the administrator account, this can be done by following the below steps:
On The BMIT Cloud Control Panel
- Navigate to the Microsoft 365 service purchased (Sevices > My Services > Microsoft product purchased).
- Click on the Change Password button as shown below.
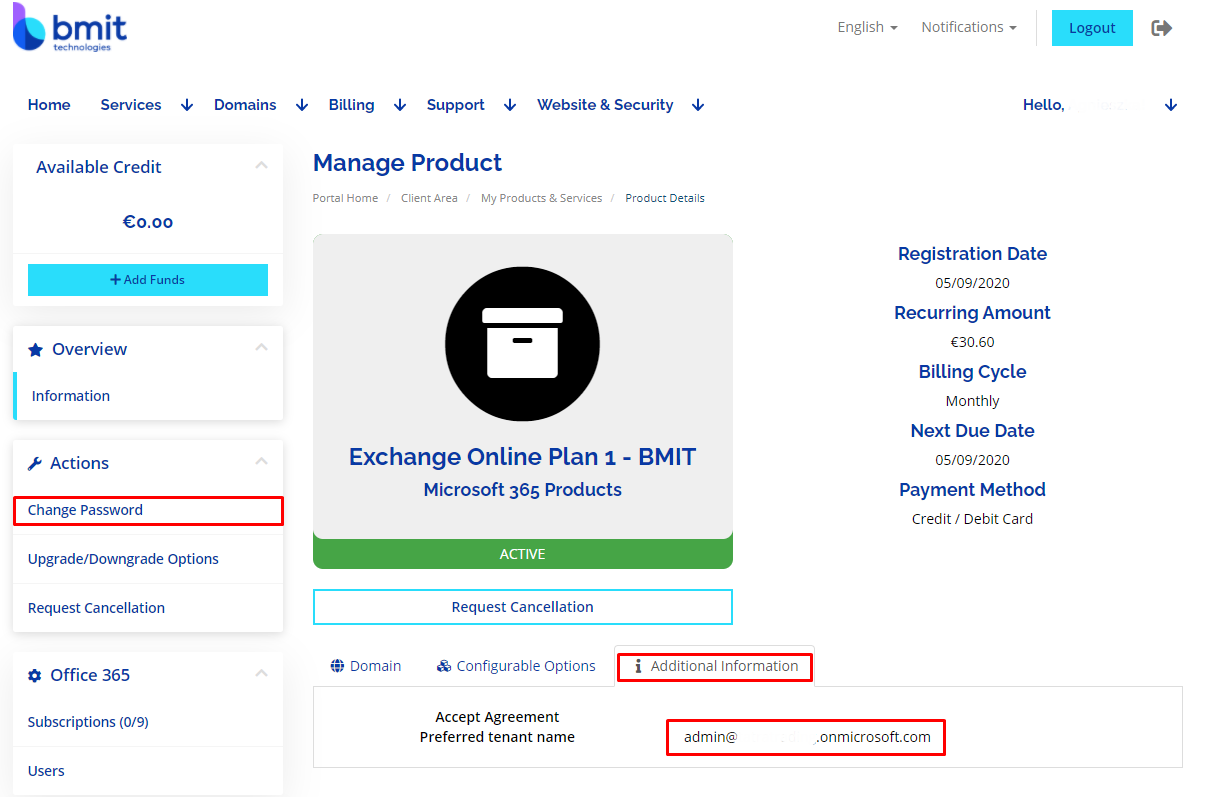
- The username can be found from the Additional Information section as shown above.
On The Microsoft Admin Center
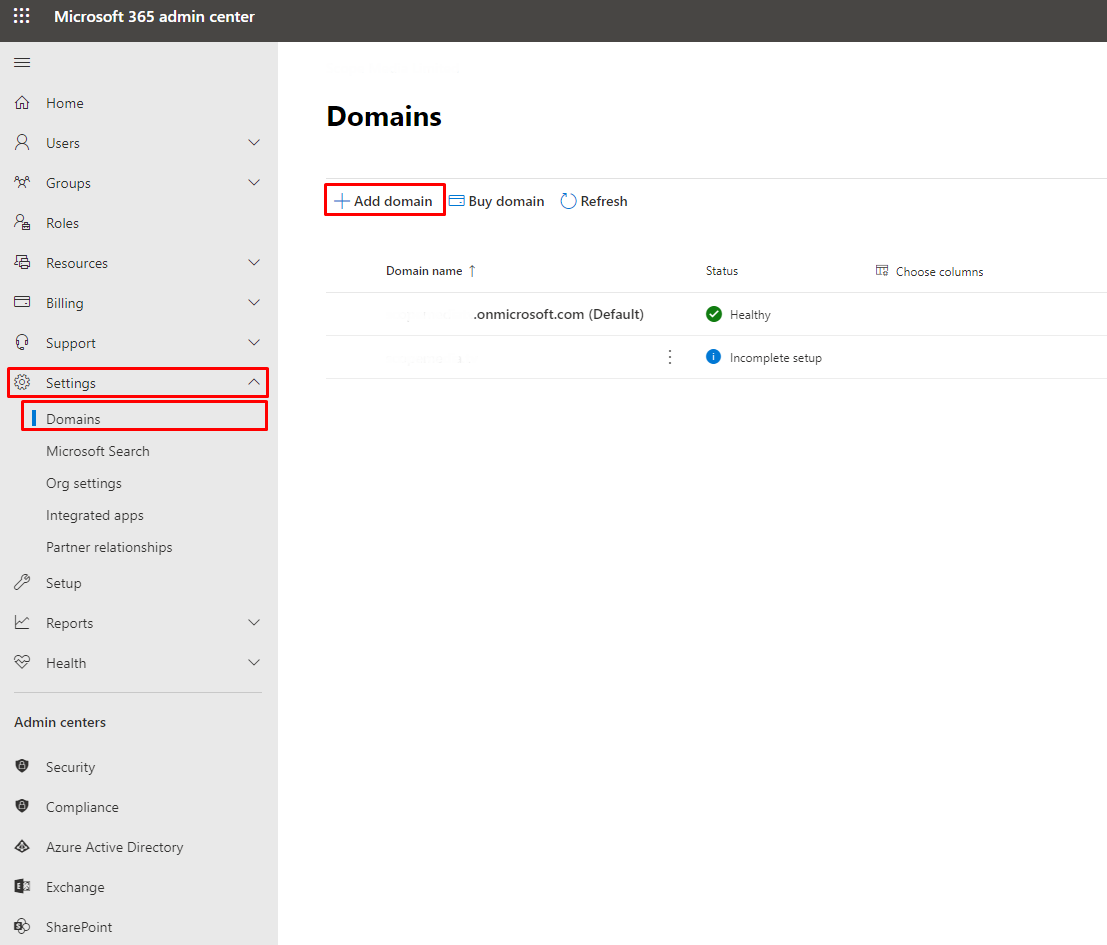
After the above steps have been completed you will have full access to the Microsoft 365 service and can begin configuring. Before adding the users you must first link the domain into the Microsoft Portal, this will require you to add a TXT record to your DNS hosting to verify domain ownership and that it is not used as a spoofing account.
This can be done by following the below steps:
- Log into the Microsoft Admin Center with the credentials obtained above.
- From the left side navigation bar click on Show all.
- Click on Settings in the left side navigation bar.
- Click on Domains.
- Click on Add domain.
- Type in the domain you want to add the mailboxes on and press continue (domain must already exist and have DNS hosting).
- Select Add a TXT record to the domain's DNS records during the wizard.
- You will be welcomed with the TXT record that you need to add to your DNS hosting for verification purposes. Copy the value and go to your DNS hosting.
Note
Should your DNS be hosted at BMIT you may find a guide on how to add DNS records here.
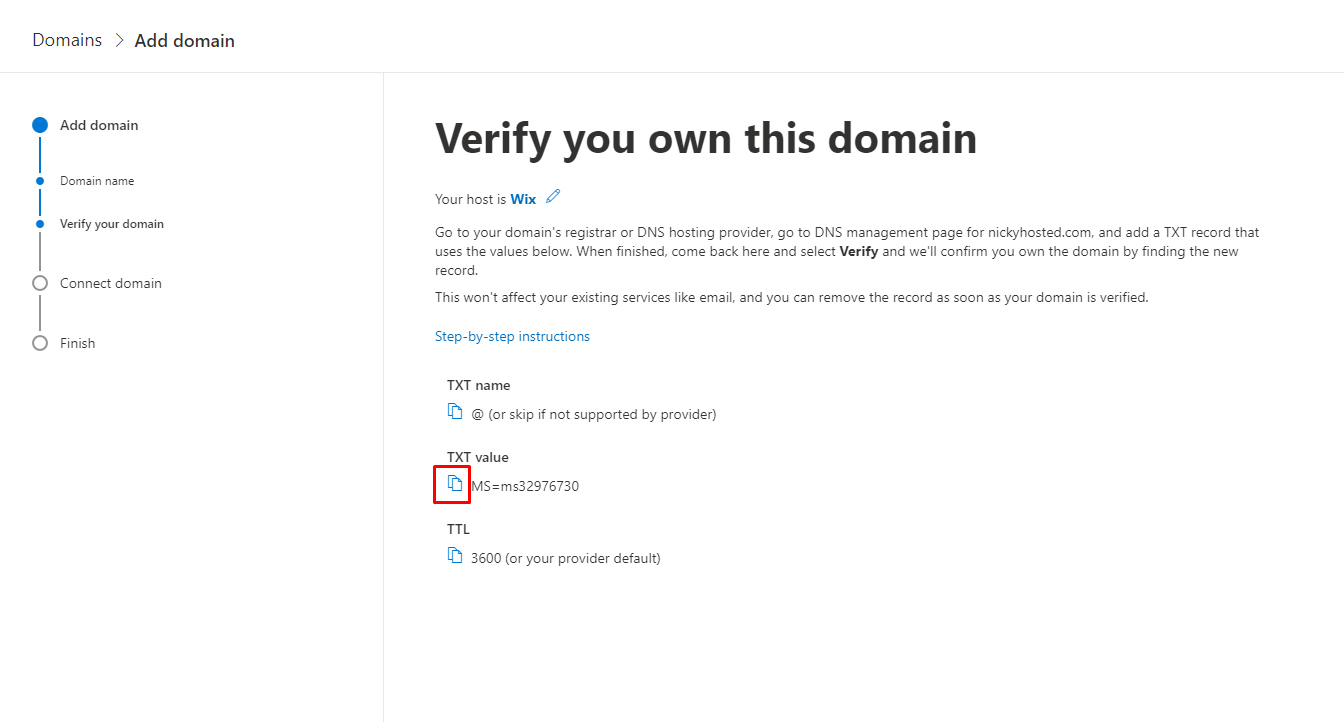
- Once the record has been inputted on your DNS hosting proceed to press Verify. (It may take a few minutes for your DNS record to propagate).
- Select Add your own DNS records in the next page of the wizard.
- Select Exchange and Exchange Online Protection and input the given MX, TXT and CNAME records into your DNS hosting.
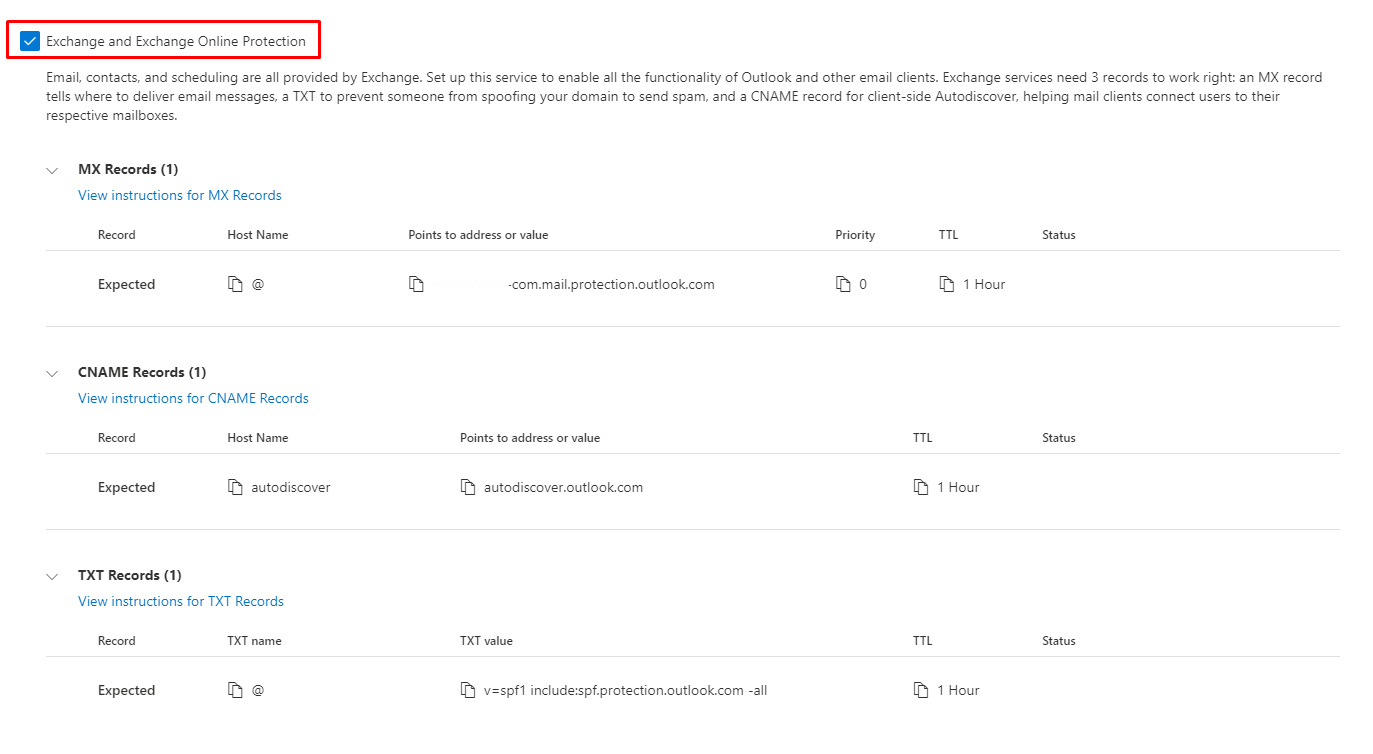
- Once done press continue and finish the setup (It may take a few minutes for your DNS records to propagate).
At this stage we have purchased the Microsoft 365 subscription, gained access to the Microsoft 365 admin center, connected a domain to the account and added all the required DNS records. The next step now is to add the users.
This can be done by following the below steps:
- Navigate to Users from the left side menu.
- Click on Active Users.
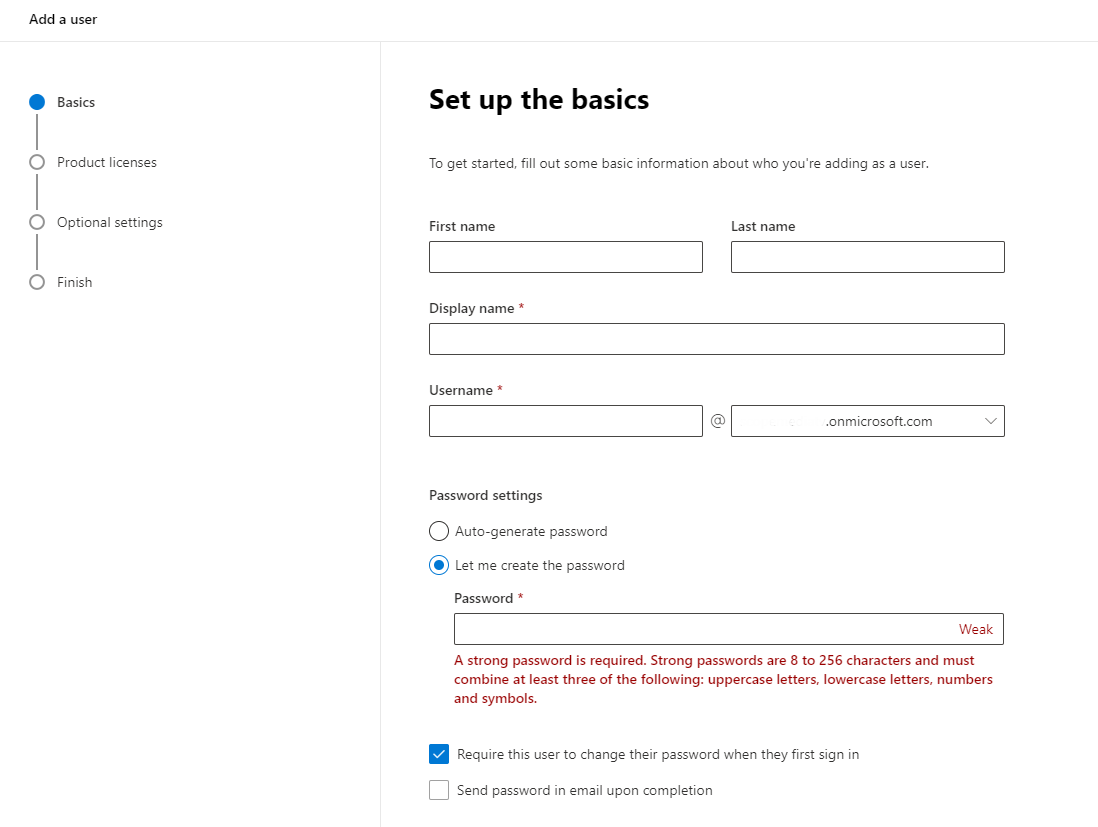
- Click on Add a user.
- Enter the desired details for the user and select the desired domain, click next.
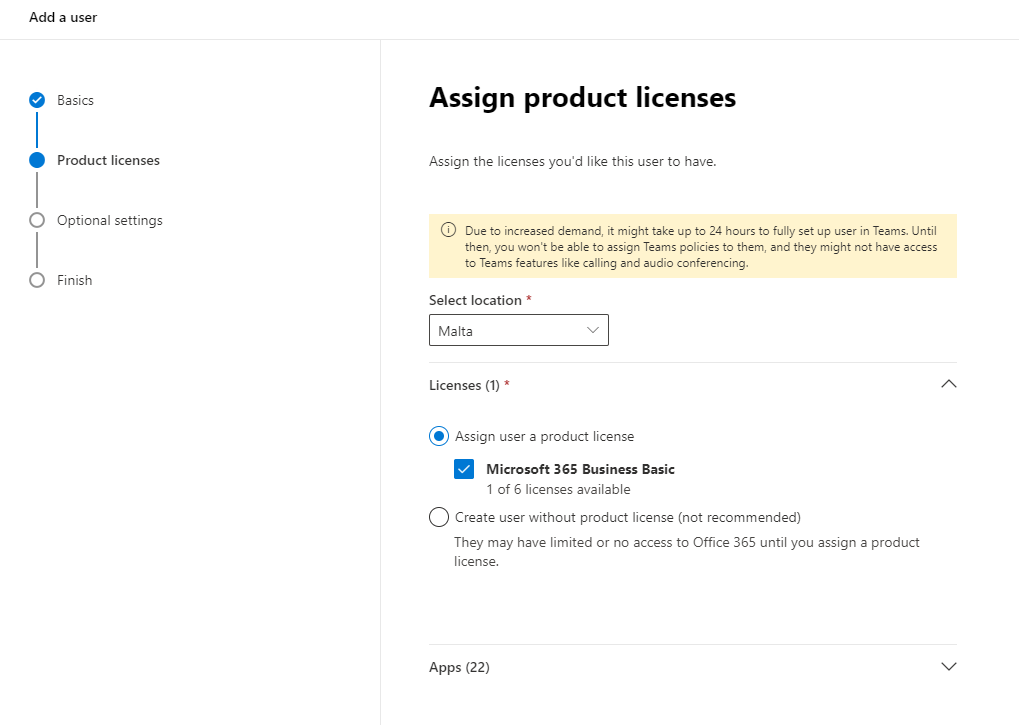
- Assign a license to the user.
- Keep pressing Next and Finish adding.
We have now completed the configuration of a new Microsoft 365 email subscription.
Warning
Please note that by default a new Microsoft Account has MFA enabled and a pasword expiry policy set. Should you not want this, they will need to be disabled.